
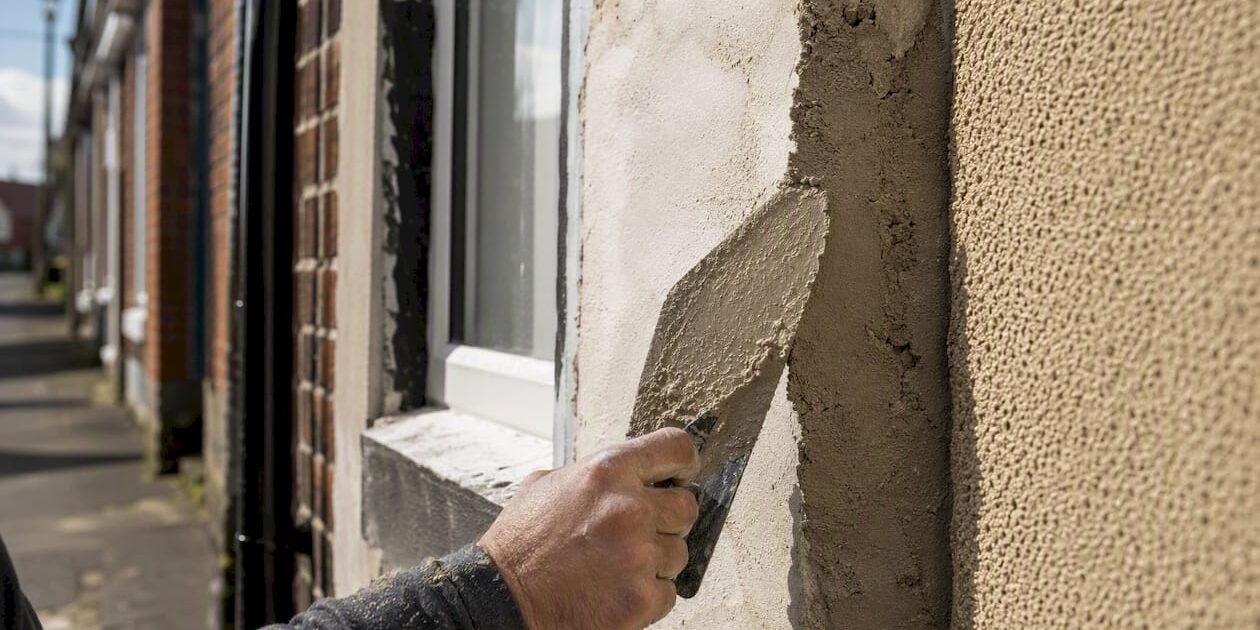
For most UK homes, the right render comes down to one rule: match breathability to your wall construction. Older solid-walled properties built before the 1920s need a breathable render such as lime or hydraulic lime. Modern cavity-walled or insulated homes can take acrylic, silicone thin-coat, or monocouche systems without risk. Get that single decision wrong and you can trap moisture in the fabric of your home, causing damp, spalling, and expensive remedial work.
Modern render systems fall into three broad families: mineral/cementitious (sand and cement, monocouche), polymer-modified thin coats (acrylic, silicone), and natural/traditional (lime, pebbledash, cork). Each family suits a different wall type, exposure level, and maintenance appetite.
Three rules of thumb to keep in mind before you read further:
- Age and substrate first. Solid brick or stone walls built before 1920 need a breathable render (lime or hydraulic lime). Cavity blockwork from the 1950s onwards can take most systems.
- Exposure drives specification. A north-facing or coastal elevation needs a hydrophobic, flexible system. Silicone thin-coat or monocouche both perform well in exposed UK conditions.
- Maintenance appetite shapes cost. Sand and cement costs less upfront but requires repainting every 5–8 years. Silicone and monocouche cost more initially but are genuinely low maintenance for 20–25 years.
Pro Tip: Before you request a single quote, identify whether your walls are solid or cavity construction. That one fact narrows your viable render options by half and prevents a contractor from specifying the wrong system.
Key takeaways
Matching your render type to your wall construction and age is the single most important decision in any rendering project, and getting it wrong is expensive to fix.
| Point | Details |
|---|---|
| Match breathability to wall age | Solid pre-1920s walls need lime or hydraulic lime; cavity walls from the 1950s onwards can take most systems. |
| Check planning before you start | Conservation areas and listed buildings may require consent; confirm with your LPA before specifying any system. |
| Whole-life cost beats upfront price | Silicone and monocouche cost more initially but require minimal maintenance over 20–25 years. |
| Preparation determines longevity | Substrate repair, priming, and mesh reinforcement at junctions are non-negotiable steps, not optional extras. |
| Ajcandsonbuilders for local expertise | Ajcandsonbuilders surveys, specifies, and installs the full range of render systems across Liverpool and Merseyside, with written warranties on every job. |
Table of Contents
- What render actually does, and why the choice matters
- The main types of house rendering compared
- How rendering is applied: what a professional job looks like
- How to choose the right render for your home
- Typical UK costs, lifespans, and maintenance
- UK planning, conservation areas, and listed buildings
- Common rendering mistakes and how to avoid them
- Ajcandsonbuilders: a typical professional rendering workflow
- When to attempt DIY rendering and when to hire a professional
- Ajcandsonbuilders: professional rendering in Liverpool and Merseyside
- Sources
What render actually does, and why the choice matters
Render is a coating applied to the external face of a wall to protect the substrate from weather, improve appearance, and in some systems contribute to thermal performance. It is not simply a cosmetic finish. The external envelope of your building is its first line of defence against wind-driven rain, frost, and UV degradation, and the render you choose determines how well that envelope performs over decades.
You might consider rendering for several reasons: to refresh tired or poorly faced brickwork, to cover a substrate that is difficult to maintain, to integrate external wall insulation (EWI) into a refurbishment, or simply to achieve a clean contemporary finish. Each motivation points toward a different system.
The advantages of rendering are real: a well-specified system protects masonry for 20–30 years, eliminates the need to repoint or paint facing brick, and can add meaningful kerb appeal. The risks are equally real. A breathable lime render on a modern cavity wall will weather faster than necessary. A cement-rich render on a Victorian terrace will crack as the building moves and trap moisture behind the coat. Industry guidance consistently notes that there is no single best render — suitability is driven by substrate, age, and breathability requirements.
Check your substrate before you decide anything else. A visual inspection and a simple moisture reading from a damp meter will tell you whether your walls are wet, whether existing render is bonded, and whether the surface needs repair before any new system goes on.
The main types of house rendering compared
What follows is a type-by-type breakdown of the systems you are most likely to encounter or be quoted for on a UK residential project. Each entry covers composition, key advantages, key limitations, and the wall types it suits best.
Sand and cement render
Sand and cement is the traditional workhorse of UK rendering, mixed on site from Portland cement, sharp sand, and water, typically applied in two coats at a combined thickness of 15–20 mm according to industry standards. It is the most widely understood system among general builders and the most affordable in material terms.
Pros: Low material cost, widely available, familiar to most tradespeople, can be textured or painted in any colour.
Cons: Relatively rigid, which means it cracks as buildings move seasonally. Cement and sand renders are more prone to cracking than flexible modern thin-coat or lime systems, and once cracked, water ingress accelerates deterioration. It is also largely impermeable, making it unsuitable for solid-walled older properties.
Best for: Post-1950s cavity-walled homes where movement is limited and the homeowner is comfortable with periodic repainting every 5–8 years.
Hydraulic and non-hydraulic lime render
Lime render is the historically correct choice for solid-walled properties. Non-hydraulic lime, such as NHL 2 or NHL 3.5 types, is the softest and most breathable, suited to the oldest and most delicate masonry. Hydraulic lime sets faster and offers slightly more durability while retaining good breathability.
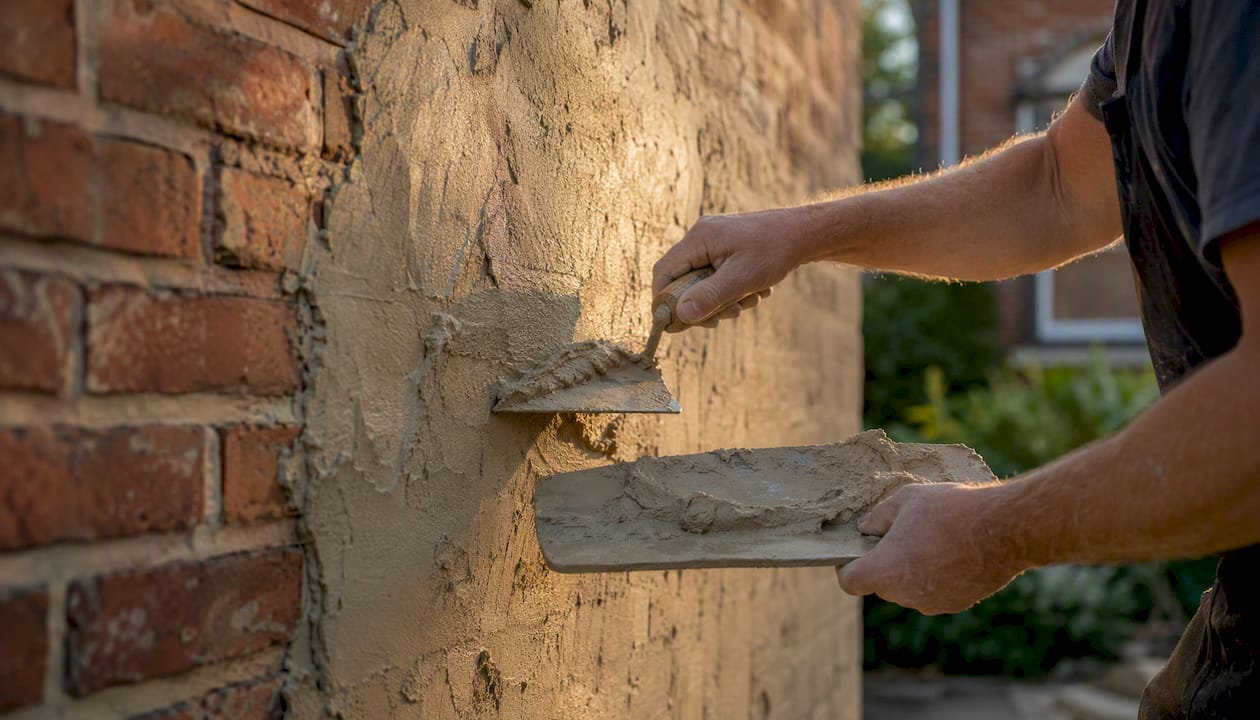
Pros: Lime renders allow moisture to escape from solid walls, reducing the risk of trapped damp. They are also self-healing to a degree, as the carbonation process slowly fills hairline cracks over time.
Cons: Slow to cure (each coat can take weeks in cool weather), requires skilled application, and is not compatible with EWI systems in the conventional sense. Material and labour costs are higher than sand and cement.
Best for: Pre-1920s solid brick or stone properties, listed buildings, and conservation-area homes where breathability is non-negotiable.
Monocouche (through-colour) render
Monocouche is a factory-blended, through-coloured cementitious render applied as a single coat, typically at around 15mm. Because the colour runs through the full depth of the coat, it does not need painting. It is popular for contemporary new-build and refurbishment projects where a clean, consistent finish is the goal.
Pros: Monocouche is fast to apply and through-coloured, eliminating the need for a decorative paint coat. It is available in a wide range of factory-mixed colours and textures, from fine scraped to rougher tyrolean finishes.
Cons: Colour choice is fixed at specification stage and cannot easily be changed later. It is not breathable enough for solid older walls and is more expensive per m² than sand and cement.
Best for: Modern cavity-walled homes, new extensions, and any project where low ongoing maintenance and a contemporary finish are priorities.
Acrylic/polymer render
Acrylic render is a thin-coat system (typically 1.5–3mm) applied over a base coat and reinforcement mesh. The polymer binders give it flexibility and a smooth, consistent finish. It is often used as the decorative top coat in EWI systems.
Pros: Flexible, crack-resistant, available in a huge range of colours, and compatible with EWI. Relatively quick to apply once the base coat is cured.
Cons: Acrylic renders are flexible but less breathable than silicone alternatives, which means they can attract algae and surface staining over time, particularly in damp northern climates. They are not suitable for solid older walls.
Best for: EWI refurbishments on cavity-walled homes, new builds, and projects where a smooth painted appearance is required at a lower cost than silicone.
Silicone thin-coat render
Silicone render is the premium thin-coat option. Applied at 1.5–3 mm over a primed base coat, it combines hydrophobic properties with genuine flexibility. Water beads off the surface rather than soaking in, which keeps the finish cleaner for longer.
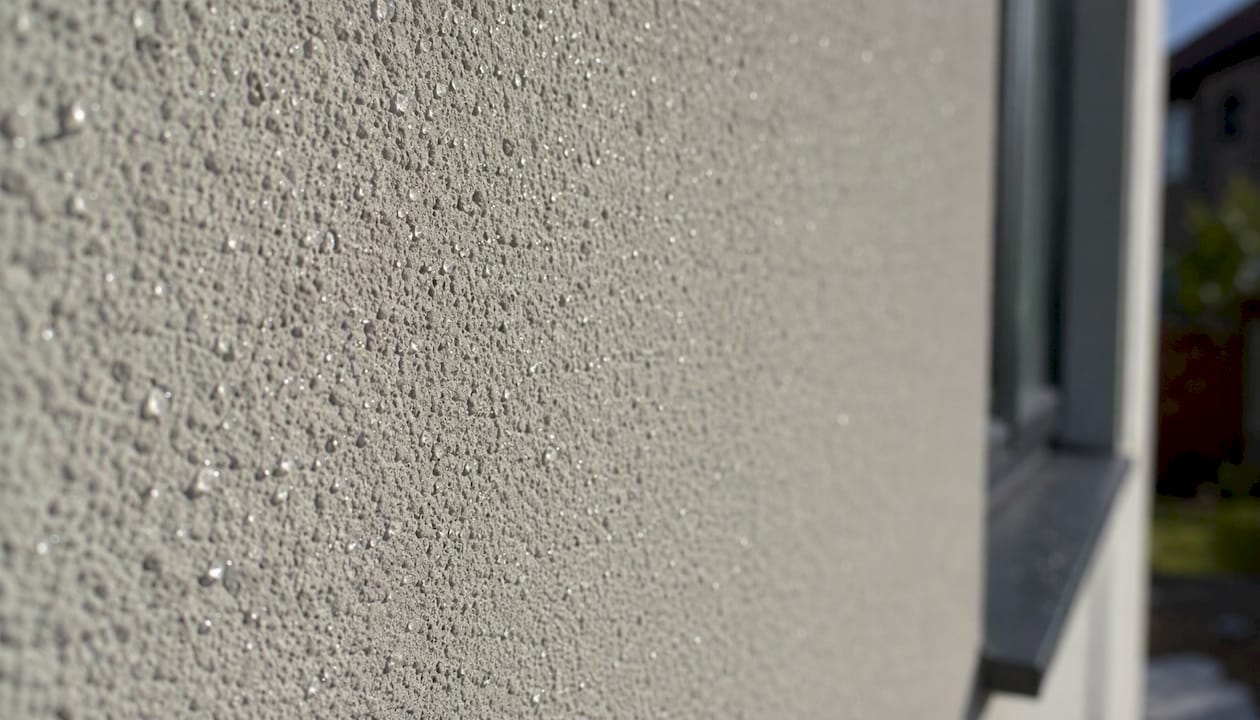
Pros: Silicone renders are hydrophobic, flexible, and low maintenance, resisting dirt and algae better than acrylic alternatives. They are well suited to exposed UK elevations and are available in a wide colour palette with UV-stable pigments.
Cons: Higher upfront cost than acrylic. Still not breathable enough for solid pre-1920s walls.
Best for: Exposed modern façades, EWI top coats, and homeowners who want a 20–25-year low-maintenance finish on a cavity-walled property.
Pebbledash and roughcast
Pebbledash involves throwing small aggregate (pea gravel or crushed stone) onto a wet render coat; roughcast mixes the aggregate into the render before application. Both were widely used on UK housing primarily in the mid-20th century and remain common in Scotland, Northern Ireland, and parts of northern England.
Pros: Durable, weather-resistant texture that hides substrate imperfections well. Relatively low material cost.
Cons: Difficult to repair invisibly, as matching aggregate is hard to source. Removing pebbledash from a solid wall can damage the substrate underneath. Not breathable enough for the oldest solid-wall construction.
Best for: Matching existing pebbledash on inter-war or post-war housing, or where a highly textured, weather-resistant finish is needed on a cavity-walled property.
Cork and spray-cork render
Spray-cork is an emerging system that applies a cork-aggregate render in two coats, typically by machine spray. Cork renders offer combined thermal and acoustic benefits and are breathable, making them a faster option on larger façades.
Pros: Breathable, thermally beneficial, and genuinely eco-friendly. The spray application is fast on large elevations.
Cons: Specialist product with fewer trained applicators in the UK. Higher material cost than conventional systems. Colour range is more limited than silicone or acrylic.
Best for: Eco-conscious refurbishments, larger façades where thermal improvement is a goal, and projects where breathability is needed but lime is not appropriate.
Clay render
Clay render is a niche, natural product used primarily in eco-build and heritage contexts. It is highly breathable and vapour-permeable, making it compatible with timber-frame and straw-bale construction as well as some older masonry.
Pros: Extremely breathable, natural material, low embodied carbon.
Cons: Not weather-resistant without a protective finish coat or lime wash. Requires specialist knowledge and is not widely available through mainstream builders’ merchants.
Best for: Eco-builds, natural building projects, and internal applications on heritage fabric.
Render type comparison at a glance
| Render type | Best for (property/age) | Breathability | Typical cost signal (m²) | Expected lifespan | DIY-friendly? | EWI compatible? |
|---|---|---|---|---|---|---|
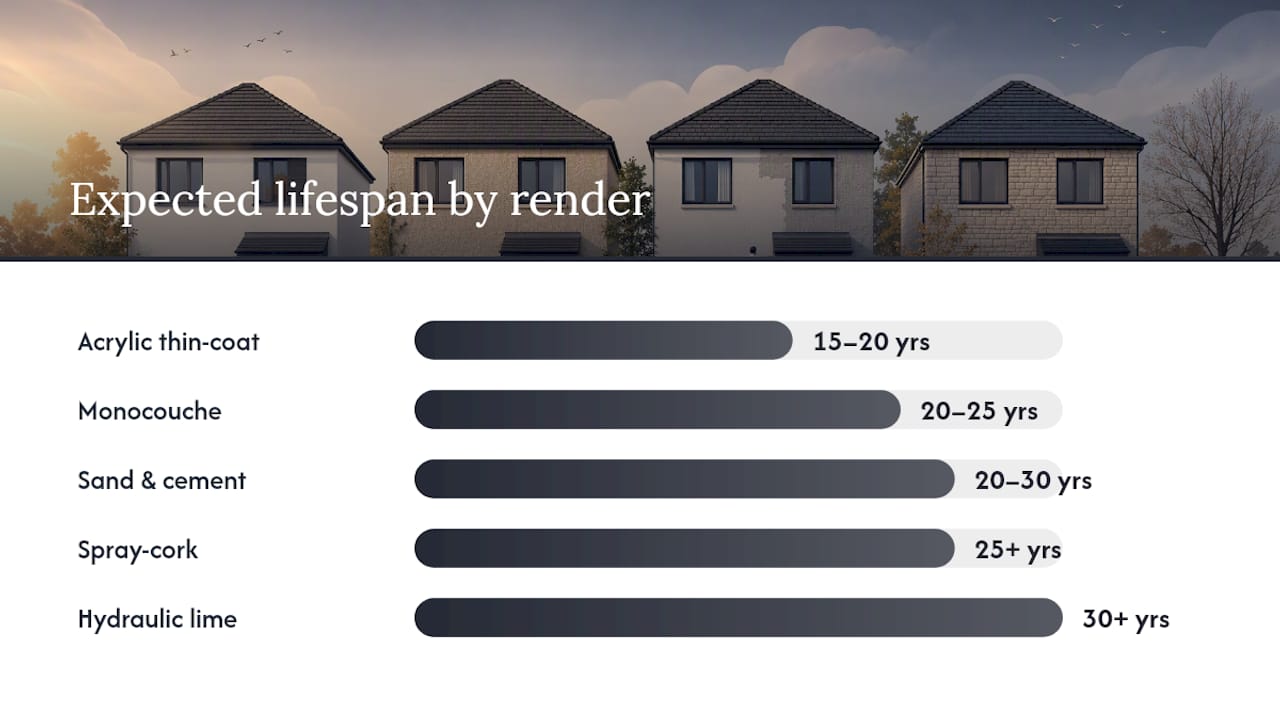
| Sand and cement | Post-1950s cavity walls | Low | Lower range | 20–30 years with repainting every 5–8 years | Possible for experienced DIYers | Rarely used as EWI top coat |
| Hydraulic lime | Pre-1920s solid walls | High | Mid-to-high range | 30+ years | Skilled DIY only | No |
| Monocouche | Modern cavity walls, new builds | Low-medium | Mid range | 20–25 years | Professional recommended | Yes (as base coat) |
| Acrylic thin-coat | EWI systems, cavity walls | Low-medium | Mid range | 15–20 years | Professional only | Yes (common top coat) |
| Silicone thin-coat | Exposed modern façades, EWI | Low-medium | Higher range | 20–25 years | Professional only | Yes (premium top coat) |
| Pebbledash/roughcast | Inter-war to post-war housing | Low-medium | Lower-mid range | 30+ years (if intact) | Possible for experienced DIYers | No |
| Spray-cork | Eco refurbishments, large façades | High | Higher range | 25+ years | Professional only | Yes |
| Clay | Eco-builds, heritage fabric | Very high | Specialist pricing | Variable | Specialist only | No |
Pro Tip: Never specify a cement-rich or acrylic render on a solid-walled Victorian or Edwardian property. The wall cannot breathe through the coat, moisture accumulates behind it, and the freeze-thaw cycle will eventually blow the render off the face — taking chunks of masonry with it.
How rendering is applied: what a professional job looks like
Understanding the application process helps you judge whether a contractor’s quote is realistic and whether a DIY attempt is within your capability. A properly executed render job follows a clear sequence, and shortcuts at any stage tend to show up as failures within a few years.
- Substrate inspection and repair. The contractor assesses the wall for loose material, cracks, damp, and areas of failed existing render. Any defective render is hacked off, cracks are cut out and filled, and brickwork defects are repaired before the new system goes on. Skipping this step is the single most common cause of render failure.
- Priming and adhesion preparation. Depending on the system, the substrate may be dampened, primed with a bonding agent, or treated with a stabilising solution. Porous substrates absorb moisture from the render too quickly, causing it to dry out before it bonds properly.
- Reinforcement mesh application. Where substrates change (for example, old brick meeting new blockwork on an extension), alkali-resistant fibreglass mesh is bedded into the base coat. Professionals apply mesh at substrate junctions to prevent reflective cracking at joints, and this step is non-negotiable on mixed-substrate walls.
- Base coat (scratch coat) application. The base coat is applied at 8–12mm, scratched to create a key for the next layer, and left to cure. Even on systems marketed as single-coat, experienced installers typically apply a levelling base coat on uneven masonry to achieve a durable, crack-resistant finish.
- Finishing coat application. The decorative top coat is applied at the manufacturer’s specified thickness, then textured or smoothed to the agreed finish. For thin-coat systems, this is typically 1.5–3mm over the cured base.
- Curing and protection. Fresh render must be protected from frost, direct sun, and rain during the curing period. In UK conditions, this typically means a minimum curing period of 24–48 hours for certain render types, based on typical guidance. hours for thin-coat systems and several weeks for lime renders, based on common industry drying time recommendations.
- Final inspection and snagging. A thorough walk-round checks for holidays (missed areas), cracking, colour consistency, and correct detailing at reveals, sills, and movement joints.
For a typical semi-detached UK house with a straightforward cavity-walled substrate, a two-coat sand and cement or monocouche job takes around 3–5 days on site. Adding external wall insulation boards typically extends the programme to 7–10 days or more, depending on the complexity of detailing around windows, doors, and soffits. Cold or wet weather can add days to any curing-sensitive system.
Pro Tip: Ask your contractor whether they plan to apply a base coat even if the product is marketed as single-coat. On any wall with surface variation, a base coat is not optional — it is what separates a finish that lasts 25 years from one that starts cracking within five.
The DIY question deserves a straight answer. Small patch repairs to existing sand and cement render are within the capability of a careful, experienced DIYer with the right tools and materials. A full façade re-render is not. The risks include poor substrate preparation, incorrect mixing ratios, inadequate curing protection, and the absence of a manufacturer-backed warranty. Professional renderers carry public liability insurance and can offer a workmanship guarantee that a DIY job cannot replicate.
How to choose the right render for your home
Narrowing your options to two or three viable systems is straightforward once you work through a short checklist. Take these questions with you when you walk the property or speak to a contractor.
Substrate and wall construction checklist:
- Is the wall solid brick/stone (pre-1920s) or cavity construction (post-1950s)? Solid walls need breathable renders.
- Is there existing render? If so, is it bonded, cracked, or damp behind? Failed existing render must be removed before a new system is applied.
- Are there mixed substrates (original masonry plus a newer extension)? Mesh reinforcement is required at the junction.
- Is the wall damp? Identify and resolve the source before rendering. Render over a wet wall will fail.
- Is the property listed or in a conservation area? This affects both the render type and whether consent is required (see the planning section below).
Exposure and performance checklist:
- Which direction does the elevation face? North and west-facing walls in the UK receive the most wind-driven rain and benefit from hydrophobic systems.
- Is the site coastal or elevated? Silicone or monocouche systems are better suited to high-exposure locations than sand and cement.
- Do you plan to add EWI now or in the future? If so, specify a system designed for EWI from the outset.
Questions to ask a contractor before you agree to anything:
- Which render system do you propose, and why is it suited to this substrate?
- Can you provide the manufacturer’s system specification document?
- Does the system carry a manufacturer warranty, and for how long?
- Will you apply a base coat and mesh reinforcement where substrates change?
- Can you provide references from similar projects completed in the last two years?
- What preparation work is included in the quote, and what is excluded?
Red flags in a proposal:
- No manufacturer system specification offered.
- No mention of substrate repair or preparation in the scope.
- Offering to render over existing failed render without removal.
- No reference to movement joints on long elevations.
- A quote with no written scope of works.
If a contractor cannot answer questions 1–4 clearly, treat that as a signal to look elsewhere. A well-specified render job is a long-term investment, and the specification document is your evidence that the right system was used correctly.
Typical UK costs, lifespans, and maintenance
Render costs vary considerably by system, substrate condition, access requirements, and regional labour rates. The figures below are ballpark signals to help you assess quotes, not fixed prices. Always obtain at least three written quotes from contractors who have inspected the property.
Cost signals vary widely by system: conventional cement renders sit at the lower end of the material and labour range, while premium EWI plus silicone finishes can be significantly higher per m². Designs in Detail’s architect’s guide notes that system choice, substrate condition, and access all affect final pricing.
Ballpark cost signals by system (material and labour combined):
- Sand and cement: lower end of the market; requires repainting every 5–8 years, which adds to the whole-life cost.
- Monocouche: mid-range per m²; no painting required, so whole-life cost is competitive over 20–25 years.
- Acrylic thin-coat: mid-range; generally has a lower upfront cost than silicone but may require cleaning or recoating sooner in damp climates, according to common practice.
- Silicone thin-coat: higher upfront per m²; genuinely low maintenance for 20–25 years, making it cost-effective over time.
- Lime render: mid-to-high range; specialist labour adds cost, but it is the only appropriate system for solid older walls.
- Spray-cork: higher range; specialist application and material costs, offset by thermal and acoustic benefits.
Regional variation is real. Labour rates in London and the South East are typically higher than in the North West, Midlands, and Wales. Access costs (scaffolding) are often quoted separately and can add a meaningful sum to the total for a two-storey property.
Expected lifespans:
- Sand and cement typically lasts 20–30 years with repainting every 5–8 years and regular maintenance.
- Lime render can last several decades when correctly specified and applied.
- Monocouche has a lifespan of around 20–25 years with minimal maintenance.
- Silicone thin-coat renders generally last around 20–25 years and their hydrophobic properties help reduce algae and staining.
- Acrylic thin-coat renders typically last around 15 to 20 years in UK conditions.
- Pebbledash: 30 years or more if the original application was sound.
Maintenance checklist:
- Inspect the render annually for hairline cracks, particularly around window reveals and at movement joints.
- Clean the surface every 2–3 years with a low-pressure wash to remove algae and biological growth, especially on north-facing elevations.
- Repaint sand and cement render every 5–8 years using a breathable masonry paint.
- Fill hairline cracks promptly with a compatible filler before water ingress widens them.
- Call a contractor if you see bulging, hollow-sounding sections, or cracks wider than 2mm. These indicate substrate movement or bond failure that requires professional assessment.
A note on estimates: no contractor can give you a firm price without inspecting the substrate. Any quote issued without a site visit should be treated as indicative only. Substrate repairs, scaffolding, and access difficulties are the most common reasons a job costs more than an initial estimate suggested.
UK planning, conservation areas, and listed buildings
Rendering your home is not always a permitted development right. Before any work starts, you need to understand whether your property falls within a category that requires prior approval or formal consent.
When you may need planning permission or listed-building consent:
- Conservation areas: Changing the external appearance of a property in a designated conservation area may require prior approval from your local planning authority (LPA), even if the work would otherwise be permitted development. The specific rules vary by area and by the LPA’s Article 4 directions.
- Listed buildings: Any alteration to a listed building that affects its character requires listed-building consent. This applies to render type, colour, and method. Using a cement-based render on a listed solid-walled building is likely to be refused on conservation grounds.
- Permitted development caveats: Standard rendering of a non-listed, non-conservation-area property is generally permitted development, but this is not universal. Flats, properties in national parks, and homes subject to specific planning conditions may have restrictions.
Authoritative guidance consistently emphasises checking local planning rules for conservation areas or listed status before altering external finishes. The consequences of proceeding without consent can include enforcement notices and a requirement to reinstate the original finish at your own cost.
Action steps before you start:
- Contact your LPA’s planning department to confirm whether your property is in a conservation area or subject to Article 4 directions.
- If the property is listed, speak to the conservation officer before specifying any system. They will advise on appropriate materials and the consent process.
- For heritage fabric, use like-for-like materials on repairs. A lime render on a lime-rendered building; a matching aggregate on a pebbledash elevation.
- Request from your contractor a system specification that confirms material compatibility with the existing substrate and, where relevant, compliance with conservation requirements.
Pro Tip: If you are unsure whether your property is listed or in a conservation area, the Historic England National Heritage List for England and your LPA’s online planning map are both free to search. Five minutes of checking can save you from an enforcement notice.
Common rendering mistakes and how to avoid them
Most render failures trace back to a small number of recurring errors. Knowing what they are helps you spot a poor proposal before work starts.
The most frequent mistakes:
- Inadequate substrate preparation. Loose, contaminated, or damp surfaces prevent the render from bonding. Inadequate surface preparation is one of the most common causes of cracking and detachment. Any quote that does not include a preparation allowance is cutting corners.
- Wrong render type for solid walls. Applying a cement-rich or polymer render to a pre-1920s solid-walled property traps moisture and causes damp, spalling, and structural damage over time. The breathability rule is not optional on older buildings.
- No mesh reinforcement at substrate junctions. Where old brickwork meets new blockwork, the two materials move at different rates. Without alkali-resistant mesh bedded into the base coat at the junction, reflective cracking is almost inevitable.
- Omitting movement joints on long elevations. Render expands and contracts with temperature. On elevations longer than approximately 6 metres, movement joints allow this movement to occur without cracking the face. Many DIY and budget jobs omit them entirely.
- Painting non-breathable masonry paint over lime render. Lime render must be finished with a breathable lime wash or breathable masonry paint. A standard vinyl or acrylic masonry paint seals the surface and defeats the breathability the lime render was specified to provide.
- Rendering over failed or damp existing render. New render applied over a substrate that is already failing will fail in the same way, often faster. Existing render must be tested for bond and moisture before a decision is made to overcoat or remove.
Pro Tip: Before any render system is applied across a mixed substrate (for example, an original wall plus a newer extension), insist on a written confirmation from the contractor that alkali-resistant mesh will be used at the junction. This single detail prevents the most common type of reflective cracking on extended properties.
Ajcandsonbuilders: a typical professional rendering workflow
Understanding how a professional rendering job is managed from first contact to handover helps you set realistic expectations and ask the right questions of any contractor you approach. The workflow below reflects the approach Ajcandsonbuilders takes on residential rendering projects across Liverpool and Merseyside.
Typical project timeline for a semi-detached refurbishment:
- Initial survey. A site visit to assess substrate condition, identify any damp or structural issues, confirm wall construction (solid or cavity), and discuss the homeowner’s finish and colour preferences. EWI is assessed at this stage if the homeowner is considering insulation as part of the project.
- System specification. Based on the survey findings, a render system is specified by type, manufacturer, and application method. The specification document confirms breathability requirements, base coat and mesh details, and the decorative finish.
- Written scope and quote. A detailed written scope of works is issued, covering preparation, repairs, render application, movement joints, and curing requirements. This document forms the basis of the contract.
- Substrate preparation and repairs. Any failed render is removed, cracks are cut out and filled, and brickwork defects are addressed before the new system is applied. This stage is never skipped.
- Base coat and mesh application. The base coat is applied with reinforcement mesh at all substrate junctions and changes of plane.
- Finishing coat and texture. The decorative top coat is applied to the agreed finish, with colour consistency checked across the elevation.
- Curing and protection. The render is protected during the curing period, with the contractor responsible for monitoring weather conditions and protecting fresh work.
- Handover and documentation. On completion, the homeowner receives the manufacturer’s system specification, the warranty document, and a record of the materials used.
Documents and guarantees you should receive from any professional renderer:
- Manufacturer’s system specification confirming the products used and the application method.
- Manufacturer’s product warranty (typically 10–25 years depending on the system).
- Contractor’s workmanship guarantee.
- Written scope of works signed by both parties.
- Photographic record of substrate condition before and after preparation.
Client checklist for contractor visits:
- Confirm the contractor has inspected the substrate in person before issuing a price.
- Ask to see examples of completed projects of a similar type and age of property.
- Request a sample panel of the proposed finish before full application begins.
- Confirm that the defect rectification period and curing requirements are written into the contract.
You can view examples of completed rendering projects in the Ajcandsonbuilders project portfolio to get a sense of the finishes and substrates the team has worked with across Merseyside.
When to attempt DIY rendering and when to hire a professional
The honest answer is that most whole-façade rendering jobs are not suitable for DIY, and the gap between a competent amateur and a trained renderer is wider than it looks from the outside.
Small patch repairs to existing sand and cement render are a reasonable DIY task for a homeowner with basic plastering experience, the right tools, and patience. Matching the texture and colour of an existing finish is the hardest part, and even experienced DIYers often find the patch visible for years.
When to hire a professional:
- The substrate is solid brick or stone and requires a lime or hydraulic lime system. Lime render is unforgiving of incorrect mixing ratios and application technique.
- The project involves EWI boards, which require precise fixing, board alignment, and a manufacturer-compliant top coat to maintain the system warranty.
- The property is listed or in a conservation area, where the specification must satisfy the conservation officer and the work may need to be documented.
- The elevation is long, multi-storey, or requires scaffolding. Working at height on a scaffold introduces safety and access considerations that go beyond render skill.
- The substrate is mixed (original masonry plus extension), requiring mesh reinforcement at junctions.
A professional render job carries a workmanship guarantee and a manufacturer warranty that a DIY job cannot replicate. Over a 20–25-year lifespan, the cost difference between a professionally applied silicone system and a DIY sand-and-cement attempt narrows considerably once repainting, repairs, and potential remedial work are factored in.
Ajcandsonbuilders: professional rendering in Liverpool and Merseyside
If you are planning a render project in Liverpool or Merseyside and want to get the specification right from the start, Ajcandsonbuilders offers a complete service from initial survey through to installation and aftercare. The team works with the full range of systems covered in this guide, from lime renders on period properties to silicone thin-coat and EWI finishes on modern homes, and every job begins with a proper substrate assessment rather than a price issued from a photograph.

When you get in touch, you can expect a site survey, a written scope of works, a clear three-part quote covering preparation, materials, and labour, a realistic programme, and full documentation on completion. For projects where rendering is part of a larger house renovation scope, the team can coordinate the full sequence of works, including structural repairs, EWI, and finishing, so nothing falls through the gaps between trades.
To discuss your project and arrange a survey, contact Ajcandsonbuilders in Liverpool and Merseyside directly. Getting the right specification costs nothing at the enquiry stage and can save you from a costly remedial job further down the line.
Sources
The sources below provide authoritative, UK-focused guidance for homeowners who want to go deeper on specification, planning, and technical detail.
- House Rendering Options Explained – Your Complete Guide to Choosing the Right Render
- House rendering architect’s guide: the pros, cons, and more
- House rendering: Pros and cons plus all the different types of render | Homebuilding
- What Type Of Render Is Best? | External House Rendering
- Types of Rendering: Cement, Lime & Silicon Explained