
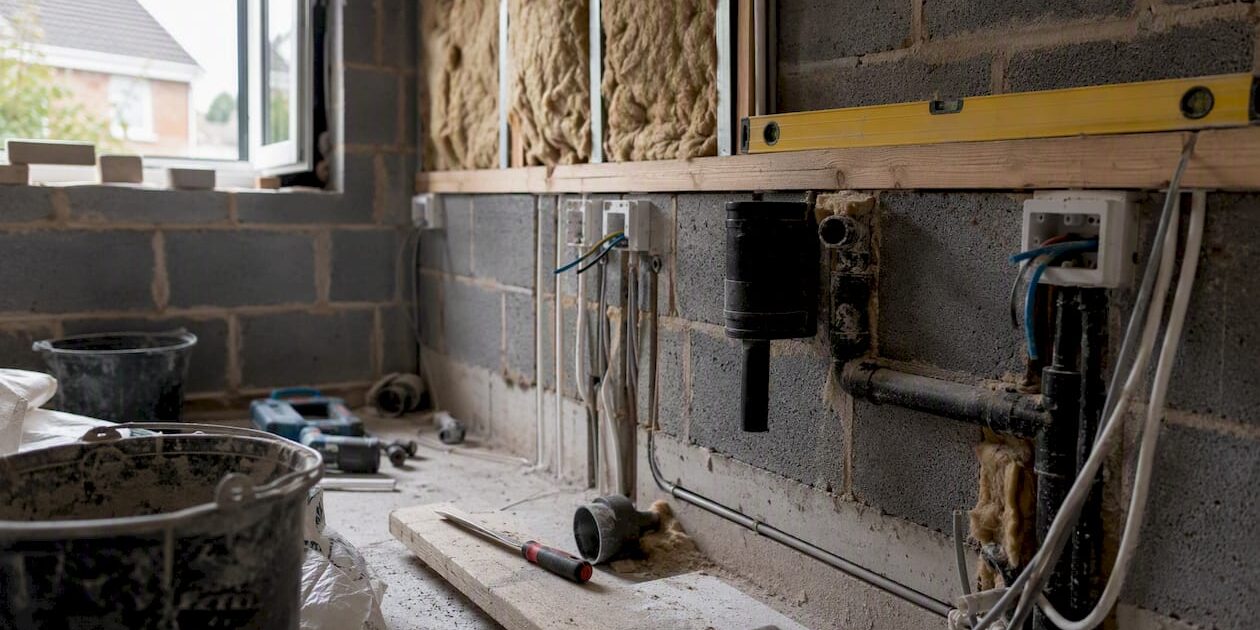
Yes, you can add a utility room to most UK homes — the key is siting it near existing plumbing, drainage and electrical runs, then confirming ventilation and structural implications before any work begins. This utility room addition planning guide treats the project exactly as it deserves: like a small extension, where services and structure come first and finishes come last.
Three immediate checks before anything else:
- Services: Is there a cold-water feed, a 40mm waste standpipe connection and a power supply within practical reach of your chosen location?
- Space and layout: Plan for at least 4m² of usable floor area; 6–8m² gives comfortable multi-use capability with a clear 900mm walkway.
- Structural implications: Does your chosen location require removing or altering a load-bearing wall, or cutting through an external leaf?
Quick checklist to take to your first builder meeting:
- Room dimensions (length, width, ceiling height) with photographs
- Appliance list with model numbers and dimensions (washing machine, dryer, sink, fridge)
- Desired functions (laundry, boot storage, pet area, secondary food storage)
- Location of nearest soil stack, cold-water stopcock and consumer unit
- Any preferred finishes or existing kitchen palette to match
Planning Portal and GOV.UK Building Regulations guidance are the authoritative starting points for permission and compliance questions. For structural alterations in Liverpool and Merseyside, Ajcandsonbuilders carries out site surveys, services verification and full fit-out coordination.
Table of Contents
- Where should you site your new utility room?
- What appliances and services does a utility room need?
- How do you manage moisture and ventilation effectively?
- What are the best materials for a utility room?
- Do you need planning permission or Building Regulations approval?
- How much does a utility room addition cost in the UK?
- What are the most common utility room design mistakes?
- When should you hire a professional, and what to bring to the meeting?
- How Ajcandsonbuilders approaches a utility room addition
- Key takeaways
- Ajcandsonbuilders: your local utility room addition specialists
- Useful sources and next steps
Where should you site your new utility room?
The single most important siting decision is proximity to existing services. Every metre you move a waste pipe away from the soil stack adds cost, complexity and potential gradient problems. The same logic applies to cold-water feeds and electrical circuits. Siting the utility room next to the kitchen, rear lobby, or an internal garage wall that backs onto the kitchen is almost always the most cost-effective choice.
Common siting options and their trade-offs:
- Garage corner or annexation: Good for larger utility rooms with space for a secondary fridge, chest freezer or pet-washing station. Requires insulation, damp-proofing and possibly a structural lintel if you’re opening between the garage and the house. Our garage conversion guide covers the structural considerations in detail.
Connectivity matters beyond just services. The utility room should sit on the shortest logical route between the kitchen and an external door, so laundry, shopping and muddy boots all flow through it naturally rather than through the main living space.
Pro Tip: Never move the main soil stack to suit a preferred location. The cost of relocating a 110mm soil stack, including re-routing, new supports and building control sign-off, routinely exceeds the savings from a more convenient position. Work to the stack, not against it.
If you are considering a purpose-built extension to house the utility room, our guide to home extension types in the UK explains which extension forms suit different plot constraints and budgets.
What appliances and services does a utility room need?
Planning appliances and their service requirements before the walls go up is what separates a well-functioning utility room from one that causes problems for years. Treat this stage like designing a mini-kitchen: measure every appliance accurately before specifying joinery, and map service routes on a floor plan before first fix.
Commonly included appliances:
- Washing machine (freestanding or integrated)
- Tumble dryer (vented, condenser, or heat-pump)
- Washer-dryer combination unit
- Utility sink with mixer tap
- Secondary fridge or chest freezer
- Motorised ceiling airer
- Ironing station or pull-out board
Service requirements by appliance
| Appliance | Water supply | Drainage | Electrical requirement | Notes |
|---|---|---|---|---|
| Washing machine | Cold feed (hot optional) | 40mm standpipe, 600mm high | Dedicated fused spur | Anti-vibration gap |
| Vented tumble dryer | None | None | Dedicated fused spur | External vent duct required |
| Heat-pump dryer | None | Condensate drain or tank | Dedicated fused spur | No external duct needed |
| Utility sink | Hot and cold feeds | 40mm trap to waste | Socket for mixer/disposal | Isolation valves on both feeds |
| Secondary fridge/freezer | None | None | Socket | Separate circuit preferred |
| Motorised ceiling airer | None | None | Switched fused spur | Ceiling joist load check required |
Checklist to confirm with your electrician and plumber before first fix:
- Consumer unit capacity for additional circuits (washing machine and dryer each benefit from a dedicated fused spur)
- Position of cold-water stopcock and whether a secondary isolation valve is needed
- Waste standpipe height (600mm from floor is standard for most machines)
- External wall position for dryer duct (vented dryers only)
- Condensate drain route for heat-pump dryers
- Earthing and bonding requirements for the sink area
For detailed guidance on electrical upgrades during a renovation, our article on electrics renewal during renovation explains what to expect from a qualified electrician at each stage. Running Cat6 ethernet to the utility room while the walls are open is also worth considering: if you plan to use the space as a home network hub, retrofitting structured cabling is significantly more expensive than running it during the build.
How do you manage moisture and ventilation effectively?

A washing machine and tumble dryer together can release several litres of water vapour into the air during a single cycle. Without adequate extraction, that moisture condenses on cold surfaces, leading to mould, deteriorating finishes and structural dampness over time. Ventilation is not optional in a utility room — it is a Building Regulations requirement under Part F.
Your ventilation options, from simplest to most thorough:
- Humidity-sensing extractor fan: The most practical choice for most utility rooms. It runs automatically when moisture levels rise, rather than switching on and off with the light. A humidity-controlled extractor costs only marginally more than a standard fan but prevents damp far more reliably.
- External dryer duct: Mandatory for vented tumble dryers. The duct must exit through an external wall with a louvred or flap-type terminal to prevent backdraught. Keep the duct run as short and straight as possible; each 90-degree bend reduces extraction efficiency.
- Trickle vents: Useful in utility rooms with windows; they provide background ventilation without mechanical assistance.
- Mechanical ventilation with heat recovery (MVHR): Appropriate for windowless utility rooms within a larger whole-house system. Adds cost but recovers heat from extracted air.
Moisture-control musts:
- Fit an extractor fan with a humidistat, wired independently of the light switch
- Vent all vented tumble dryers directly to the outside, never into a roof void or loft
- Specify waterproof or water-resistant finishes on all walls within splash zones
- Install a floor drain or waterproof threshold detail if the room will include a pet-washing area or utility sink
- Consider a dehumidifier for rooms used heavily for indoor drying on airers
Pro Tip: Wire the humidity-controlled extractor fan on its own switched fused connection unit, separate from the lighting circuit. This allows it to run on after the light is switched off, clearing residual moisture from the room — which is exactly when condensation is most likely to form.
Concrete layout rules to follow
- Maintain a minimum 900mm clear walkway between opposing runs — this is the developer specification standard and the practical minimum for comfortable use
- Allow appropriate depth per appliance as the baseline; freestanding washing machines and dryers typically have similar dimensions.
- Leave a small anti-vibration gap between the washing machine and adjacent cabinetry to prevent noise transmission and cabinet damage.
- Plan door swing carefully: an inward-opening door that sweeps across the appliance front is one of the most common and avoidable layout errors
Pro Tip: Draw your layout to scale on graph paper or use a free online room planner before committing to joinery. Place cut-out rectangles representing each appliance at the correct scale and physically move them around. It takes twenty minutes and regularly reveals clearance problems that would otherwise only appear on installation day.
What are the best materials for a utility room?
Durability and moisture resistance are the non-negotiable criteria. Designers consistently recommend water-resistant finishes that still feel cohesive with the rest of the home, rather than purely functional materials that look out of place next to a well-fitted kitchen.
Flooring:
- Luxury vinyl tile (LVT): The most popular choice for UK utility rooms. Warm underfoot, slip-resistant, fully waterproof, and available in wood and stone effects that complement kitchen flooring. Compatible with underfloor heating.
- Porcelain or ceramic tile: Extremely durable and water-resistant. Harder underfoot and colder without underfloor heating. Grout lines require sealing and periodic maintenance.
- Heavy-duty vinyl sheet: Budget-friendly and fully waterproof. Less visually refined than LVT but practical for high-traffic utility areas.
- Avoid: Laminate flooring (swells and delaminates when wet), carpet (traps moisture and odours), and unsealed timber (warps and stains).
Worktops and splashbacks:
- Compact laminate: Highly water-resistant, available in a wide range of finishes, and significantly more durable than standard kitchen laminate. A practical choice at mid-range budget.
- Quartz or engineered stone: Premium durability, non-porous, and easy to clean. Matches kitchen worktops if you want a cohesive look between the two rooms.
- Upstands and splashbacks: Specify a water-tolerant upstand of at least 100mm behind the sink. Full-height splashback tiles or a matching quartz panel behind the sink area prevent long-term water ingress into the wall.
Cabinet finishes:
- Painted MDF or rigid thermofoil doors in a moisture-resistant specification outperform standard kitchen units in a utility environment
- Concealed ventilation gaps at the back of base units prevent moisture build-up behind appliances
- Stainless steel or solid brass hardware resists corrosion better than chrome-plated zinc in a damp environment
Pro Tip: Choose a utility room palette that either matches or deliberately contrasts with your kitchen. A matching palette creates a seamless flow between the two rooms; a contrasting palette — say, a deep navy utility against a light grey kitchen — signals that the utility is a working space without making it feel like an afterthought.
Do you need planning permission or Building Regulations approval?
Many internal utility room conversions — reclaiming an existing room or annexing part of a garage — do not require planning permission. However, any structural alteration, new extension, or change that affects drainage, ventilation or electrical systems will trigger Building Regulations approval. Always verify your specific case on the Planning Portal or GOV.UK Building Regulations guidance before work begins.
When Building Regulations approval is required:
- Any structural change, including removing or altering a load-bearing wall or installing a new lintel
- New or altered drainage connections to the soil stack or external drain
- New electrical circuits or consumer unit modifications (unless carried out under a Competent Person Scheme such as NICEIC or NAPIT)
- Mechanical ventilation installations in certain configurations
- Any new extension, regardless of size, unless it falls within Permitted Development rights
Party wall considerations:
If your utility room addition involves cutting into or building against a shared wall with a neighbour, the Party Wall etc. Act 1996 applies. You must serve notice on the adjoining owner before work begins. A party wall surveyor can advise on whether your project triggers the Act and prepare the necessary agreements.
When to appoint a structural engineer:
Opening up a wall, installing a new RSJ or goalpost frame, or converting a garage with a shared roof structure all require structural calculations from a qualified structural engineer. Building control will not sign off a structural alteration without an engineer’s specification and, in most cases, a site inspection.
Before requesting a quote, check:
- Whether your project is an internal conversion, a garage annexation or a new extension (each has different permission implications)
- Whether the chosen wall is load-bearing (a builder or structural engineer can confirm this at a site visit)
- Whether your local authority has any Article 4 Directions that remove Permitted Development rights in your area
- Whether the project affects a shared wall, boundary structure or party fence wall
How much does a utility room addition cost in the UK?
Cost varies considerably depending on whether you are converting existing space, annexing a garage, or building a new extension. The figures below reflect typical ranges for Liverpool and Merseyside; costs in London and the South East are generally higher.
| Cost band | Typical scope | Approximate range |
|---|---|---|
| Budget | Internal conversion of existing room, basic flat-pack units, vinyl flooring, minimal service rerouting | — |
| Mid-range | Garage annexation or rear lobby conversion, semi-bespoke joinery, LVT flooring, new plumbing and electrical circuits | — |
| Premium | Purpose-built extension, fully bespoke joinery, quartz worktops, underfloor heating, full structural and services package | — |
Factors that commonly inflate cost and time:
- Relocating a soil stack or waste run more than 1–2 metres from its current position
- Structural openings requiring RSJ installation and temporary propping
- Bespoke joinery with complex corner units or integrated appliance housing
- Underfloor heating installation (adds cost but is straightforward to specify at first fix)
- Asbestos surveys required in pre-2000 properties before any structural work
Typical timeline from survey to completion:
- Initial site survey and design agreement: 1–2 weeks
- Planning or Building Regulations application (if required): 4–8 weeks
- Structural engineer’s calculations and specification: 1–2 weeks
- First fix (structural work, plumbing, electrical rough-in, ventilation ducting): 1–2 weeks
- Plastering, flooring preparation and drying time: 1–2 weeks
- Second fix (joinery fitting, appliance connections, tiling, finishes): 1–2 weeks
- Snagging and Building Regulations sign-off: 1 week
A straightforward internal conversion can complete in three to four weeks from start to finish. A garage annexation with structural work typically runs six to ten weeks. A new extension, including the planning period, should be budgeted at four to six months in total.
What are the most common utility room design mistakes?
Most utility room problems are avoidable at the planning stage. The mistakes below appear repeatedly in projects where finishes were specified before services were confirmed.
Common errors and how to prevent them:
- Siting far from existing services. Moving a soil stack or extending a waste run across the house adds cost and creates gradient problems. Always map service routes before choosing a location.
- Under-specifying ventilation. A standard light-switched extractor fan is insufficient for a room with a tumble dryer and washing machine. Specify a humidity-sensing fan and a dedicated dryer duct from the outset.
- Ignoring appliance clearances. Fitting joinery without accounting for door swing, anti-vibration gaps and maintenance access leads to cupboard doors that cannot open fully and appliances that cannot be serviced or replaced without removing cabinetry.
- Choosing fragile finishes. Standard kitchen laminate worktops and painted MDF without a moisture-resistant specification will deteriorate quickly in a utility environment. Specify compact laminate or quartz for worktops and moisture-resistant paint grades for walls.
- Under-providing electrical circuits. A single double socket shared between a washing machine, dryer and fridge is both a safety risk and a practical inconvenience. Each major appliance should have its own fused spur or dedicated circuit.
- Forgetting future-proofing. Not leaving conduit for additional cabling, spare sockets for future devices, or space for a network rack are decisions that become expensive to correct later.
Do and don’t summary:
- Do confirm service routes before finalising the layout
- Do specify humidity-sensing extraction and dedicated electrical circuits
- Do measure every appliance before ordering joinery
- Don’t choose a location that requires moving the main soil stack
- Don’t use standard kitchen finishes in a utility environment
- Don’t omit maintenance access space behind and beside appliances
When should you hire a professional, and what to bring to the meeting?
Some utility room tasks are straightforward enough for a competent builder to coordinate. Others legally require a qualified tradesperson, and attempting them without one creates safety risks and invalidates building control sign-off.
Tasks that must be carried out by a qualified trade:
- Structural alterations (removing load-bearing walls, installing lintels or RSJs): requires a structural engineer’s specification and a builder experienced in structural works.
- Mains water alterations (connecting to the cold-water main, relocating the stopcock, installing isolation valves on new feeds): requires a qualified plumber, ideally CIPHE or WIAPS registered.
- New electrical circuits and consumer unit modifications: must be carried out by a Part P-registered electrician under a Competent Person Scheme (NICEIC, NAPIT or equivalent).
- External ventilation ducting through a cavity wall: requires correct cavity closers and weatherproofing; a builder or specialist ventilation installer should carry this out.
- Building Regulations applications and sign-off: your builder or a specialist agent can submit on your behalf, but the work must be inspected and certified.
What each tradesperson will do and what to ask them:
- Builder/main contractor: coordinates structural works, first fix sequencing, and manages subcontractors. Ask: “What is the sequence of works, and when do I need the plumber and electrician on site?”
- Plumber: installs water feeds, waste connections and isolation valves. Ask: “Where is the nearest suitable connection point, and will the waste gradient work from this position?”
- Electrician: installs circuits, fused spurs and the extractor fan wiring. Ask: “Does the consumer unit have capacity for the additional circuits, or does it need upgrading?”
- Structural engineer: provides calculations for any load-bearing alteration. Ask: “What will building control require to sign off this opening?”
Contractor-ready checklist to bring to your first site visit:
- Room dimensions with photographs from all four corners
- Appliance list with model numbers, dimensions and service requirements
- Location of nearest soil stack, stopcock and consumer unit (photograph these)
- Desired layout sketch (even a rough hand drawing is useful)
- Preferred finishes and any existing kitchen palette or material samples
- Any planning or Building Regulations correspondence already received
- Budget range and preferred timeline
How Ajcandsonbuilders approaches a utility room addition
At Ajcandsonbuilders, we treat every utility room addition as a services-first project. The finish comes last; the structure, drainage, ventilation and electrical provision come first. That sequencing is what prevents the expensive second-fix changes that arise when trades arrive to find services in the wrong position.
Our typical process for a utility room addition:
- Site survey: We visit the property, photograph the existing space, and identify the nearest service connection points. We confirm whether the chosen location is structurally viable without a full engineer’s report or whether calculations are needed.
- Services verification: We map the cold-water feed, soil stack position, consumer unit capacity and external wall positions for ventilation ducting before any design is finalised.
- Structural checks: Where a wall opening or lintel is required, we coordinate with a structural engineer to obtain calculations before submitting to building control. Our structural calculations guide explains what this process involves.
- Staged works: First fix (structural, plumbing, electrical rough-in, ducting) is completed and inspected before plastering. Second fix (joinery, appliance connections, tiling, finishes) follows once the shell is dry and signed off.
- Snagging: We carry out a structured snagging inspection before handover, checking appliance connections, extractor operation, door clearances and finish quality.
Practical checks we prioritise on every utility room project:
- Confirming the waste standpipe height and gradient before the floor screed is poured
- Verifying that the external dryer duct terminal is positioned away from windows and air bricks
- Checking floor tolerances for LVT or tile installation (levelness within 3mm over 1.8m is the standard threshold)
- Confirming lintel bearing lengths and padstone positions before structural openings are formed
Pro Tip: Before our site visit, photograph your existing appliances’ model number plates and measure the space with a laser measure rather than a tape. Bring those measurements and a note of your preferred finish palette. A twenty-minute preparation saves an hour of back-and-forth and allows us to provide a more accurate quote on the day.
Key takeaways
A well-planned utility room addition prioritises services, ventilation and structural clarity before any joinery or finishes are specified — that sequencing is what keeps costs predictable and the finished room functional for decades.
| Point | Details |
|---|---|
| Services come first | Confirm plumbing, drainage, electrical circuits and ventilation routes before finalising the layout or ordering joinery. |
| Minimum viable size | Plan for at least 4m² of usable floor area; 6–8m² gives comfortable multi-use capability with a clear 900mm walkway. |
| Ventilation is non-negotiable | Specify a humidity-sensing extractor fan wired independently of the light, plus a dedicated external duct for any vented dryer. |
| Materials must be moisture-resistant | Use LVT or porcelain tile for flooring and compact laminate or quartz for worktops; avoid standard laminate and carpet. |
| Ajcandsonbuilders | Provides site surveys, structural coordination, plumbing and electrical management, and full fit-out for utility room additions across Liverpool and Merseyside. |
A builder’s perspective on balancing cost, convenience and finish
The question we hear most often is: “Where should I spend and where can I save?” The honest answer is that the money you put into services and ventilation at first fix is almost never wasted, while the money you put into premium finishes at second fix is the easiest place to phase or upgrade later.
Homeowners regularly under-budget for electrical provision. Two dedicated fused spurs, a humidity-controlled extractor wired on its own circuit, and a spare double socket for future devices add relatively little to the electrician’s day rate but prevent years of inconvenience. A washing machine and dryer sharing a single socket via an adaptor is one of the most common things we see in utility rooms that were fitted cheaply and quickly.
The other area where a small spend makes a disproportionate difference is the worktop. A 1,200mm run of compact laminate worktop costs a fraction of quartz but transforms how usable the room is day to day. Conversely, bespoke painted cabinetry with integrated handles is beautiful but adds significant cost for a marginal functional gain over a well-specified flat-pack alternative in a moisture-resistant finish.
Future-proofing is where most homeowners leave money on the table by not spending it. Running a length of 25mm conduit from the consumer unit to the utility room, leaving a draw string inside, costs almost nothing during first fix. Retrofitting it after plastering costs a day’s labour and a replastered wall. The same logic applies to Cat6 ethernet, a spare 22mm copper pipe stub-off for a future water softener, and an extra fused spur position in the consumer unit.
Spend on services. Spend on ventilation. Spend on a decent worktop. Everything else can wait.
Ajcandsonbuilders: your local utility room addition specialists
Planning a utility room addition in Liverpool or Merseyside? Ajcandsonbuilders offers a complete service from initial site survey through to final snagging, coordinating structural works, plumbing, electrical installation and joinery fit-out under one roof. Rather than managing multiple trades yourself, you get a single point of contact who sequences the work correctly and keeps the project on programme.

Before we visit, have the following ready: the room dimensions and photographs, your appliance list with model numbers, the location of your nearest soil stack and consumer unit, and any finish preferences or kitchen palette samples. That preparation allows us to provide an accurate, detailed quote on the first visit rather than returning for a second survey.
For homeowners who need structural calculations alongside the fit-out, our house extension structural calculations guide explains exactly what building control requires and how we manage that process on your behalf. Our full house renovation services page covers the broader scope of what we can deliver across Liverpool and Merseyside.
Get a free quote from Ajcandsonbuilders and take the first step towards a utility room that works as hard as your household does.
Useful sources and next steps
The following authoritative sources will help you confirm requirements, check permissions and prepare for your builder conversations:
- Utility Room Addition Planning Guide | Build Design Hub
- Utility Room Planning Guide: Laundry, Tech & Storage in One Tidy Space | TrackEveryDay
- ABI Interiors — The ultimate guide to utility room design
- How to design a utility room that actually works — BH Bespoak
- Utility Room Design: Making the Most of Your New Build’s Hidden Space | New-Builds
- Utility room ideas and inspiration | The Spruce
- House extension structural calculations guide: 2026 | AJC & Son Builders