
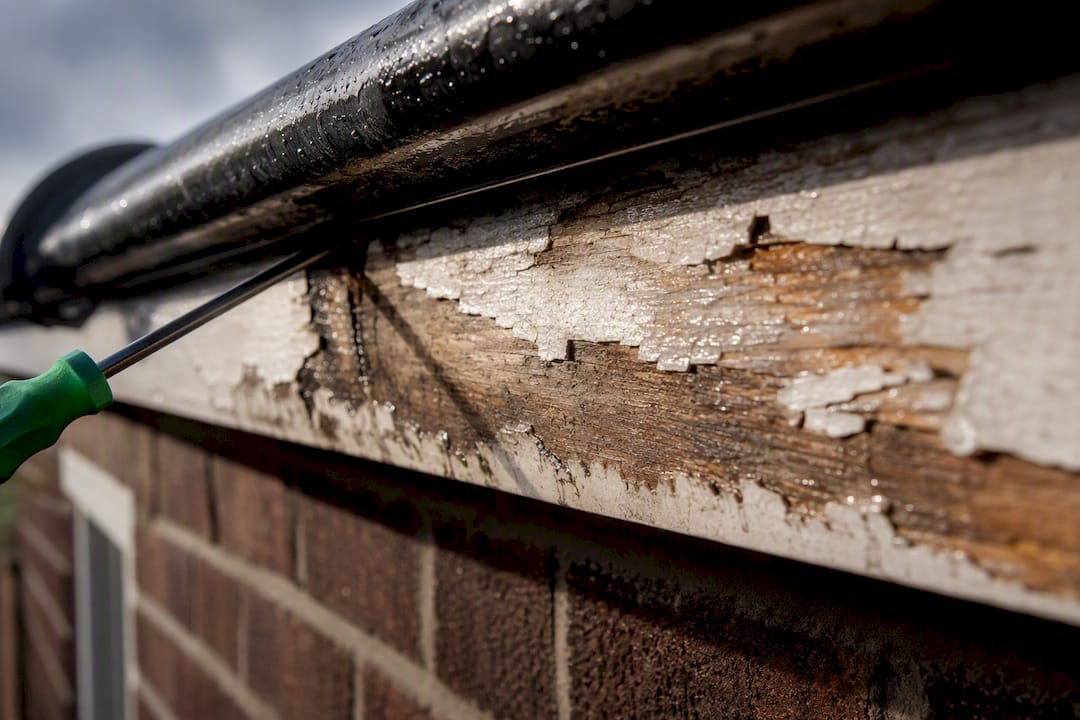
The clearest signs of rotten fascia are peeling or blistering paint, soft or spongy patches you can press a finger into, dark staining or fungal growth, and gutters that have started pulling away from the roofline. If you spot any of the softer, structural signs, don’t climb up for a closer look. Do a safe visual check from the ground and get in touch with a professional before the damage spreads.
TL;DR:
- Most fascia rot starts with paint bubbling or cracking caused by moisture infiltration, often near gutter joints or beneath brackets.
- Water backing up due to clogged gutters, poor pitch, or failed seals accelerates rot development, especially on shaded, cooler elevations.
- Ignoring fascia rot can lead to structural damage of rafters and roof decks, increasing repair costs and inviting pests and mold.
- Homeowners should perform ground-based visual checks during and after rain, using the screwdriver test on accessible areas to detect active rot.
- Professional inspections with moisture meters and framing examinations are essential if rot signs are visible, to assess full damage extent.
Table of Contents
- Warning signs of rotten fascia: a homeowner checklist
- Where rot starts and common causes to check first
- Consequences of ignoring fascia rot
- Homeowner inspection checklist: safe, step-by-step checks
- Repair versus replacement: practical thresholds and red flags
- Prevention and maintenance plan to stop fascia rot returning
- When to call a professional and what to expect from an inspection
- What the research actually tells us about fascia rot
- AJC & Son Builders: fascia, soffit and guttering assessment in Liverpool
- Sources
Warning signs of rotten fascia: a homeowner checklist
Fascia boards fail in a fairly predictable order, and knowing that order helps you catch trouble while it’s still cheap to fix. Peeling, blistering or flaking paint is usually the earliest visible clue that moisture has already worked its way into the timber underneath, even when the board still looks structurally sound from a distance.
Once moisture takes hold, the signs move from cosmetic to physical. Here’s what to look for, roughly in the order they tend to appear:
- Paint failure — bubbling, cracking or flaking paint, often concentrated near joints or beneath gutter brackets.
- Soft or spongy wood — press gently with a fingertip or blunt tool; healthy timber resists, rotten timber gives.
- Dark staining or fungal growth — brownish streaks, black speckling, or a musty smell near the eaves.
- Swelling, warping or crumbling — boards that bow outward, feel uneven, or shed material when brushed.
- Missing sections — chunks of board simply gone, usually where standing water sat longest.
- Gutters pulling away — visible gaps between the gutter and the fascia, or brackets hanging loose.
That last point deserves attention on its own. Even a gap as small as an eighth of an inch lets water track behind the gutter and onto the fascia, where it stays wet in the shade and rots the timber long before you’d notice anything from the ground.
Where rot starts and common causes to check first
Fascia rarely rots evenly across its whole length. It fails where water is forced to linger, so tracing the moisture path tells you exactly where to look first.
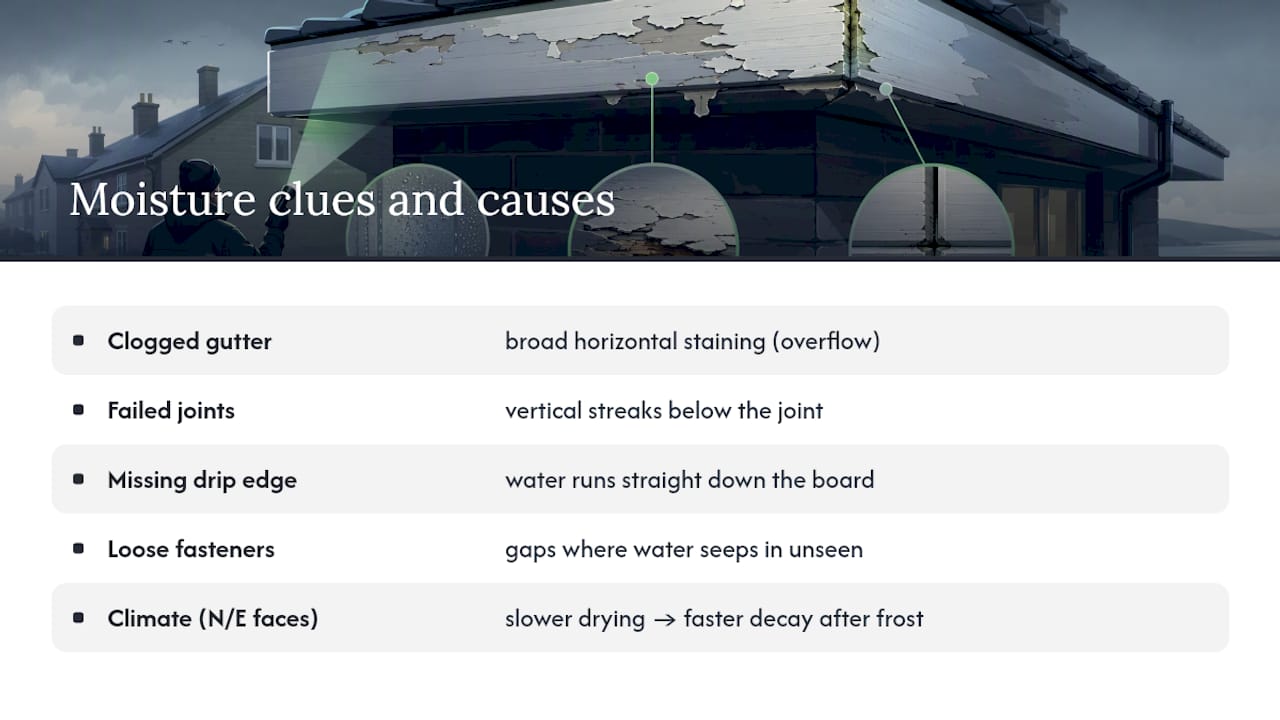
The most frequent culprit is a clogged gutter. Leaves and grit block the outlets, water backs up over the lip, and the fascia behind it stays saturated for days after every downpour. Missing drip edges and failed sealant at gutter joints create the same effect: water that should shed cleanly off the roof edge instead runs straight down the board. Undersized or poorly pitched gutters compound the problem, and fasteners that have pulled loose leave gaps where water seeps in unseen.
Climate plays a role too. Freeze-thaw cycles accelerate decay sharply once timber is already saturated, which is why north and east-facing elevations, which dry out slower, tend to show damage first. Vertical streaks below a joint usually point to a localised leak. Broad horizontal staining across a whole run suggests the gutter itself is overflowing.
Consequences of ignoring fascia rot
Left alone, rot doesn’t stay contained. Sagging fascia pulls gutters further out of alignment, which lets more water spill behind them, which softens more timber. It’s a feedback loop that speeds up the longer it runs.
From there, damage typically spreads into the soffits, then the rafter tails, and eventually the roof deck itself. At that point you’re no longer looking at a fascia repair. You’re looking at structural carpentry. Damp, rotting timber also invites mould and pests, from wood-boring insects to nesting birds, both of which add cost and complexity. What might have been a same-day repair at the paint-failure stage can become a multi-day structural job once rot reaches the framing, with scaffolding and safety considerations pushing the price up further.
Homeowner inspection checklist: safe, step-by-step checks
You don’t need to get on a roof to build a reliable picture of your fascia’s condition. Work through these steps methodically, and stop the moment anything looks structurally unsound:
- Set ground rules first. If you spot sagging, missing boards, or gutters visibly detached, don’t climb a ladder. Call a professional instead.
- Walk the perimeter with binoculars. Scan every fascia run from the ground, looking for paint failure, staining and gaps behind gutters.
- Check during and after heavy rain. A walk-round while it’s raining shows you exactly where water is overflowing or tracking down the fascia, which a dry-day inspection will never reveal.
- Run the screwdriver test on accessible boards. Press a screwdriver gently into any suspect timber. If it sinks in with little resistance, that’s active rot, not just surface weathering.
- Inspect gutter alignment and fasteners. Look for brackets pulling loose and vertical stains directly beneath every joint.
- Photograph and note everything. Record location, size and depth of any soft spots so a contractor can scope the job accurately before visiting.
Pro Tip: Keep your screwdriver test to areas you can reach safely from a stable stepladder on level ground. If a board is out of easy reach, photograph it with binoculars zoomed in and leave the physical test to a professional.
Repair versus replacement: practical thresholds and red flags
Small, localised soft spots, especially near a single leaking joint, often respond well to a targeted patch once the moisture source is fixed. That’s a reasonable DIY or small-job scope if the surrounding timber still tests firm.
The calculation changes once damage spreads. If a significant portion of a fascia run is affected, or fasteners are pulling out and the board is visibly sagging, patching becomes a false economy. Rot reaching the rafter tails or gutters pulling consistently away from the fixings is a clear signal that replacement, not repair, is the sound option.
- Localised soft spot, moisture source fixed: repair is usually viable.
- Sagging, widespread staining, or fastener pull-out: replacement is the safer call.
- Rot visible in rafter tails or soffit framing: full inspection and likely replacement.
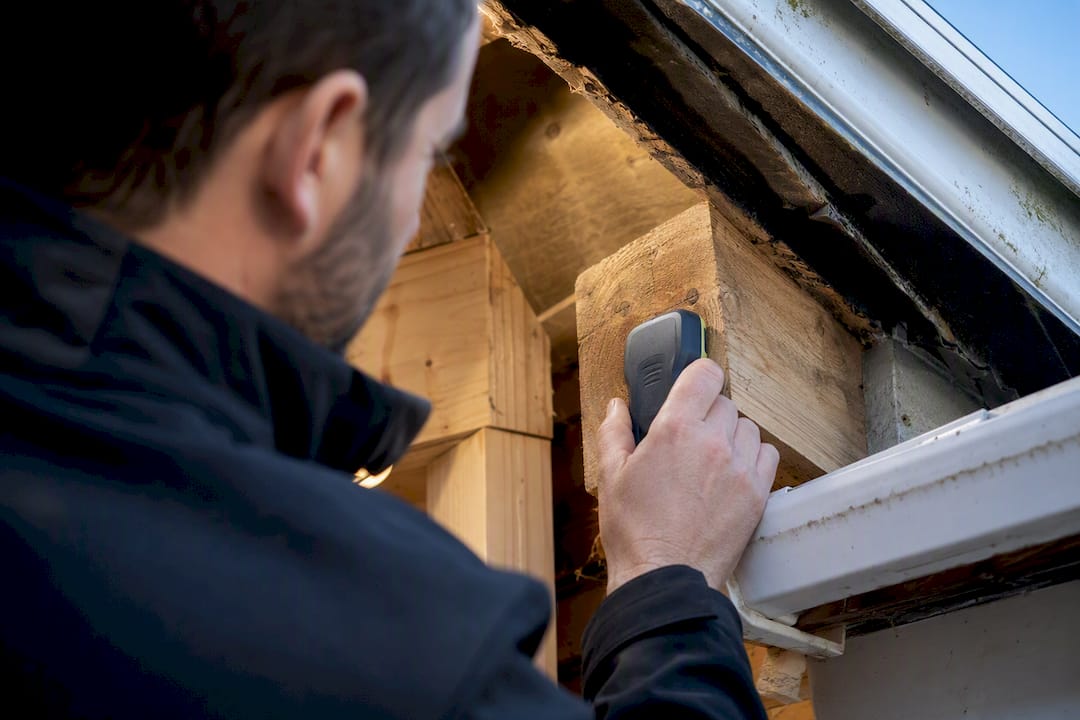
A common mistake is treating a small patch as a permanent fix without checking the rest of the run. Professionals assess the full length and the framing behind it, often with a moisture meter, before recommending a scope.
Pro Tip: If a contractor quotes a repair without checking the rafter tails or soffit framing behind the fascia, ask why. Hidden spread is the most common reason a “quick fix” needs redoing within a year.
Prevention and maintenance plan to stop fascia rot returning
Most fascia rot is preventable with a maintenance rhythm that takes an afternoon, twice a year. The goal is simple: keep water moving off the roof and away from the timber, not sitting against it.
- Clean gutters at least twice a year, and check downspouts are clear after any major storm.
- Repaint or reseal fascia every few years, choosing moisture-tolerant coatings suited to timber rather than a generic exterior paint.
- Install or repair drip edges so water sheds cleanly past the fascia instead of running down its face.
- Check gutter sizing and pitch, particularly on older properties where gutters may have been undersized for the roof area.
- Replace corroded or mismatched fasteners and confirm gutter hangers are still gripping firmly.
- Run a spring check after winter for freeze-thaw damage, and an autumn check before leaf fall clogs everything up again.
Consistent care like this, paired with attention to your render and exterior walls, keeps water where it belongs: off your timber and off your bill.
When to call a professional and what to expect from an inspection
Call a contractor once you see structural signs, sagging, widespread rot, or damage running along more than a small section of fascia, or if the affected area is out of safe reach from ground level. Attic evidence of water ingress, such as staining on the underside of the roof deck, is another reason to bring in a professional rather than guess.
A proper inspection typically includes moisture-meter readings on suspect boards, a check of the rafter tails and soffit framing behind the fascia, and an assessment of the gutter and drip-edge condition. Assessments that go beyond the visible board catch hidden spread that a homeowner check can miss. You should come away with a written scope covering repair and replacement options, so you’re deciding with full information rather than a guess.
What the research actually tells us about fascia rot
The conventional advice on fascia rot tends to fixate on the dramatic signs: sagging boards, missing sections, visible fungus. That’s advice for people who’ve already left it too long. The far more useful skill, and the one homeowners consistently underrate, is spotting paint failure early and treating it as a moisture problem rather than a cosmetic one.
Peeling paint doesn’t mean “repaint it.” It means water has already reached the timber, and the paint is simply the first place that’s visible to you. Fix the moisture source, whether that’s a blocked gutter or a failed seal at the joint, and you’ll likely never need a screwdriver test at all.
Where I’d push back on the usual checklist culture is the obsession with precise thresholds. But the real decision point is simpler: if you’re not certain whether rot has reached the rafter tails, you need someone with a moisture meter, not another opinion from a ladder. Prioritise the gutter clearance and the paint check first. Everything else follows from getting those two things right.
— Will
AJC & Son Builders: fascia, soffit and guttering assessment in Liverpool
If your fascia has already reached the soft-spot or staining stage, a professional assessment beats another season of watching and waiting. AJC & Son Builders carries out fascia, soffit and guttering repair and replacement across Liverpool and Merseyside, and a site visit gives you a clear, written answer on whether you’re looking at a repair or a full replacement, backed by an inspection of the framing behind the board, not just the surface.

Requesting a quote is straightforward: we visit, assess the fascia, soffits and gutters together, and provide a written estimate with a realistic timescale, so you know the scope and the cost before any work starts. If the rot has spread further than expected, our house renovation team can fold the fix into a wider external repair if that turns out to be the more sensible route. Get in touch through the fascias and soffits page to arrange your site visit.
Sources
- How to Spot Rotten Fascia Boards (Before It’s Too Late)
- Fascia rot from gutters: causes, spot, repair cost | TRB
- Freeze–thaw effect on the mechanical properties of different wood species
- Fascia board replacement: cost, materials & when you need it (2026) | R&E Roofing