
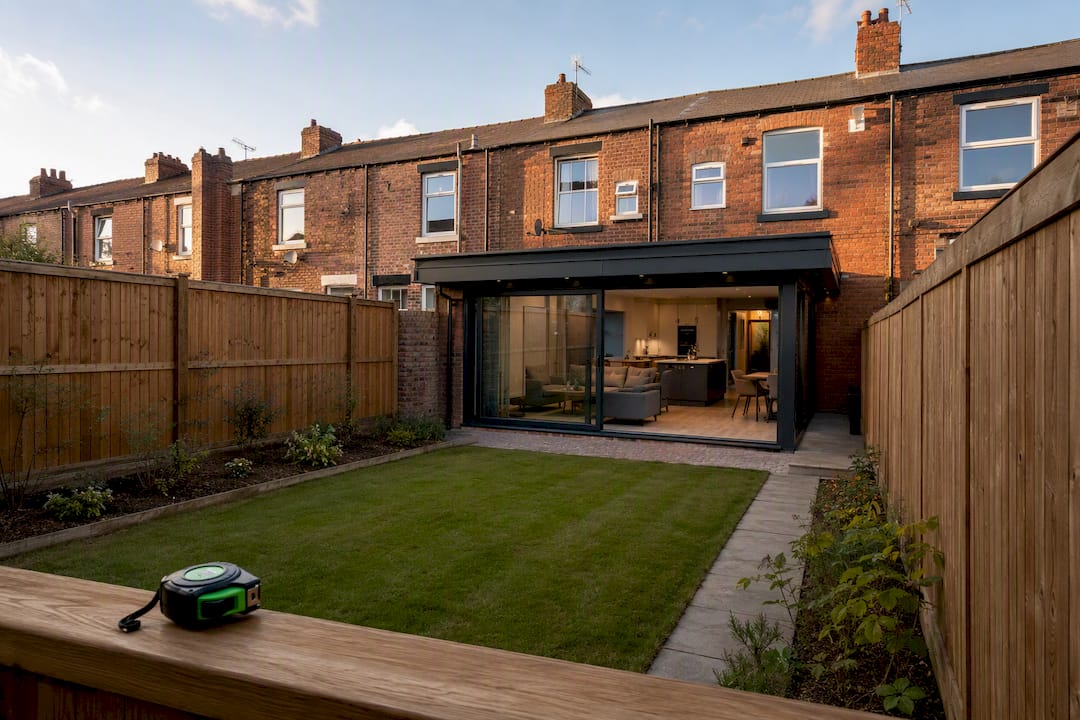
Most single storey rear and side extensions in England can go ahead as permitted development, without planning permission, provided they stay inside strict size and height limits set by the Town and Country Planning (General Permitted Development) (England) Order 2015. Check depth, width, height, the 50% curtilage rule, and whether Article 4 removes your rights before you order a single brick.
TL;DR:
- Extensions must stay within strict size limits, such as 3 meters projection for terraced and semi-detached houses, with boundary and height restrictions applying.
- The total footprint of all buildings on the land cannot exceed 50 percent of the original house’s curtilage, requiring precise measurements for compliance.
- Larger single-storey rear extensions up to 6 or 8 meters are possible through prior approval, but neighbors must be notified, and objections considered.
- Permitted development rights can be revoked on designated land or through Article 4 directions, which must be checked before proceeding.
- Securing an official Lawful Development Certificate is recommended to prevent future legal issues and facilitate property transactions.
Table of Contents
- What counts as a permitted development extension?
- Detailed limits and conditions under Class A
- Going bigger: the 6m/8m prior approval route
- Does your property sit on designated land?
- Confirming PD status and getting a Lawful Development Certificate
- Building regulations, Party Wall Act and pre-start steps
- A builder’s view: the mistakes we see on site
- Get your extension surveyed and built by AJC & Son Builders
- Sources
What counts as a permitted development extension?
Permitted development, or PD, is a set of pre-approved rights under national planning law that let you build certain extensions without submitting a planning application. It sounds liberating, and it can be, but PD is criteria based rather than discretionary. You don’t ask permission; you prove compliance. Miss one limit, even by a few centimetres, and the whole extension can lose its lawful status.
That distinction trips up more homeowners than any other part of the process. Before you commit to drawings or a contractor, run through the checklist below. It tells you in minutes whether your project is likely to qualify, or whether you need to talk to your local planning authority first.
Here’s what to measure and check straight away:
- Depth from the original rear wall: single storey rear extensions are generally capped at 3 metres for terraced, semi-detached, and most attached houses, and 4 metres for detached houses.
- Side extension width: must be single storey and no more than half the width of the original house.
- Total footprint: added buildings and extensions together cannot cover more than 50% of the land around the “original house”, known as the curtilage.
- Article 4 and conservation status: check your council’s planning map for restrictions before assuming PD applies.
- Planning history: search your address on the council portal for any previous permitted development changes, since these can eat into what’s left.
- What to have to hand: your title plan, a rough sketch of the original 1948 (or as-built) footprint, and accurate boundary measurements.
If any of these fail, or you’re unsure which date your “original house” is measured from, stop and get planning advice before spending on drawings. A five-minute council check is far cheaper than a retrospective enforcement notice.
Detailed limits and conditions under Class A
Permitted development for householders sits under Class A of the 2015 Order, and it covers three broad categories: single storey rear extensions, side extensions, and extensions of more than one storey. Each has its own set of rules, and they don’t blend into one generous allowance.
Single storey rear extensions
For most semi-detached and terraced houses, a single storey rear extension under PD cannot project more than 3 metres beyond the rear wall of the original house. Detached houses get slightly more room, up to 4 metres. Height matters too: the extension cannot exceed 4 metres at its highest point, and if any part sits within 2 metres of a boundary, the eaves height is capped at 3 metres.
Crucially, these limits aren’t a one-off allowance. If a previous owner already built a 2 metre rear extension under PD, that eats into what you have left, because the calculation runs from the original house, not the current footprint. That single point causes more enforcement disputes than any other rule in Class A.
Side extensions
A side extension permitted development route has three fixed conditions: it must be single storey only, it cannot exceed 4 metres in height, and its width cannot be more than half the width of the original house. Try to add a two storey side extension under PD and you’ll fail immediately. That always needs full planning permission, no exceptions.
If your house sits close to a classified road, additional restrictions on materials and positioning can apply, so it’s worth a quick call to the planning duty officer if your plot fronts anything busier than a residential street.
Extensions of more than one storey
Multi-storey rear extensions carry tighter geometry. The enlargement cannot extend beyond the rear wall of the original house by more than 3 metres, and it must sit at least 7 metres from any boundary opposite the rear wall. Roof pitch generally has to match the existing house as closely as practicable, and any side windows above ground floor level need obscure glazing and must be fixed shut or only openable above 1.7 metres. If your two storey plans go beyond that envelope, our guide to two storey extension planning walks through what full permission involves.
The 50% curtilage rule
Every extension, past or present, counts towards a single limit: the total area covered by buildings other than the original house cannot exceed half the curtilage, the land immediately around your home. Working this out means establishing the original footprint (as it stood on 1 July 1948, or when built if later), measuring the current plot, and adding up every extension, garage, and outbuilding built since. It’s a spreadsheet job, not a guess, and it’s where most self-assessments go wrong.
Going bigger: the 6m/8m prior approval route
If 3 or 4 metres feels tight, there’s a wider option. Under the neighbour consultation scheme, single storey rear extensions can extend to 6 metres for attached houses and 8 metres for detached houses, roughly double the standard allowance, but only through a formal prior approval application rather than a simple notification.
The process works like this:
- Submit a prior approval application to your local planning authority, including plans, dimensions, and adjoining neighbours’ details.
- The council notifies affected neighbours, who have 21 days to raise concerns about the extension’s impact on their light, outlook, or privacy.
- The authority decides within 42 days, weighing any objections against the “amenity” impact, things like overshadowing or an overbearing presence, rather than design taste.
- If no objections are raised, or the council doesn’t respond within the window, the extension is treated as approved by default under the scheme set out in the GOV.UK technical guidance.
Councils can refuse prior approval only on amenity grounds, not on general planning policy, so a well-prepared application with clear elevation drawings and honest shadow diagrams gives neighbours less to object to.
Pro Tip: Talk to your immediate neighbours before you submit, not after. A five-minute conversation over the fence resolves most objections that would otherwise sit in a formal 21-day consultation letter.
Does your property sit on designated land?
Permitted development rights aren’t universal. They’re commonly reduced or removed entirely on what planning law calls designated land, which includes conservation areas, national parks, Areas of Outstanding Natural Beauty, and World Heritage Sites, along with what’s formally termed Article 2(3) land.
On top of that, individual councils can impose an Article 4 direction on specific streets or even single properties, withdrawing PD rights that would otherwise apply nationally. These directions are common on historic terraces, where councils want design control over anything visible from the street.
Two quick checks settle this:
- Search your council’s planning map using your postcode, most authorities publish Article 4 boundaries online and let you check street by street.
- Ring the planning duty officer if the map is ambiguous or your property sits right on a boundary line, since a five-minute call beats a costly assumption.
If either check confirms a restriction, permitted development rights don’t apply, and you’ll need a full planning application regardless of how modest the extension is.
Confirming PD status and getting a Lawful Development Certificate
Once you’re confident your extension fits within Class A, the sensible next move is to get that confidence in writing. Here’s the process most homeowners follow:
- Check the council portal for your property’s planning history, searching by address to see prior extensions, appeals, or Article 4 restrictions that might have been added after you bought the house.
- Commission a measured survey if there’s any doubt about the original footprint or boundary lines. Ask the surveyor specifically for a scaled elevation drawing referencing the original house dimensions, not just the current layout.
- Apply for a Lawful Development Certificate (LDC) from your local authority. It isn’t mandatory, but it provides formal legal proof that the works are lawful, and most conveyancing solicitors will ask for one on any extension built without planning permission.
An LDC application typically takes a matter of weeks and carries a modest council fee, small change against the cost of removing an unlawful extension years later. Practitioner commentary from planning solicitors consistently flags the certificate as the difference between a smooth house sale and a stalled one.
Pro Tip: Apply for your LDC before you list the property for sale, not after an offer arrives. Buyers’ solicitors routinely delay exchange until the certificate is in hand, and that delay can cost you a buyer.
Building regulations, Party Wall Act and pre-start steps
Permitted development answers one question only: do you need planning permission? It says nothing about whether the extension is structurally sound, safely drained, or fire-compliant. That’s building control’s job, and it applies whether or not planning permission was ever needed.
Before work starts, work through this:
- Structural calculations for any new opening, beam, or foundation, usually from a structural engineer.
- Drainage and fire safety checks, both assessed separately under building regulations regardless of your PD status.
- Party Wall Act notices, served at least two months before work starts if you’re building on or near a shared boundary; our guide to party wall notices explains when a surveyor becomes necessary.
- Drainage and services survey, checking existing sewer runs before you dig; a drain survey ahead of an extension avoids nasty surprises mid-build.
- A written contract with your builder specifying start and completion dates, materials, and payment stages, alongside confirmation of site insurance.
None of this is optional simply because your extension qualifies as permitted development. PD removes one hurdle, not all of them.
A builder’s view: the mistakes we see on site
We see the same errors repeatedly. Homeowners measure from the current rear wall instead of the original house, missing an earlier extension that’s already used up their allowance. Boundary measurements get taken by eye rather than from the title plan, and side extension widths get rounded up “because it looks fine.”
None of these are fatal if caught early. A site survey before drawings are finalised, checking the original footprint, boundaries, and roof pitch matching against neighbouring properties, resolves nearly every dispute we’ve encountered before it starts. Matching brick, render, and roofline to the existing house also matters more for resale value than most homeowners expect; a mismatched extension reads as an afterthought to buyers, permitted or not. Get your measurements right at survey stage, and everything downstream, LDC, prior approval, build cost, gets simpler.
— Will
Get your extension surveyed and built by AJC & Son Builders
If you’re weighing up whether your extension will clear Class A limits or need a prior approval application, a site visit settles it faster than any online checklist. AJC & Son Builders surveys the property, measures the original footprint against current boundaries, and tells you plainly whether you’re looking at permitted development or a planning application, then carries the build through from structural calculations to finished brickwork.
An initial survey covers measured drawings, a check against your council’s Article 4 status, and support gathering the paperwork for an LDC or prior approval submission where it’s needed. From there you get a written quote covering materials, timescales, and payment stages, no vague estimates. We work across Liverpool and Merseyside on everything from a modest single storey rear extension to a full multi-storey rebuild. Get in touch through our house extension services page to book a survey and find out exactly where your project stands.
Sources
For formal definitions and evidence to support an LDC or prior approval application, go to the primary sources: the GOV.UK technical guidance, the Planning Portal’s extensions guidance, and your local council’s planning map for Article 4 checks. Use these documents directly when preparing an application, rather than relying on secondary summaries.
- Gov
- Planning Permission - Extensions — Planning Portal
- Permitted development rights for householders: technical guidance (PDF) — GOV.UK